If your a network admin, and you’re not using virtualization in your disaster recovery, then you’re probably being negligent. VMware ESXi is free. You can’t do all of the fancy stuff, like VM motion, but it is the same bare-metal hypervisor as ESX. You can register, download, and obtain a free license for ESXi here.
ESXi is pickier when it comes to hardware than its pricier counterpart ESX. However, if your hardware works with the drivers it does have, you can add your hardware IDs to the configuration files and use your hardware. If you use a system, motherboard, and/or NIC listed on the community maintained list and download and use the community maintained configthen you can forgo a lot of tinkering. If you are going to use local storage, you won’t be able to use RAID with a SATA drive, or at least I haven’t figured it out; that would probably slow things down anyway. ESXi can use storage on NFS file shares, SANs, and some NAS devices as well. I am going to look at using FREENAS to hold some VMs instead of shelling out boo koo bucks for fiber. Whatever you decide to do, make sure you get an Intel NIC listed on the HCL; I had no luck with anything else.
For now, I am using a newly built device for DR testing and proof of concept. I went to my local Micro Center, friggin love that store, and purchased an ASUS PQ5 SE2 ($95), 4 GB 800mhz DDR2 Corsair RAM ($70), a 45nm 2.6 Ghz 8mb Core 2 Quad ($189), and a 1TB WD SATA HD with a dual IO controller ($139). I happened to have a case/power supply, DVD drive, and compatible Intel NIC laying around. So I spent about $480 for the parts I needed.
I elected to install ESXi on a bootable flash drive. VMware made a video and pdf showing how. Here are the steps on how to do this on a Windows machine per yellowbrick.com:
- First get the following tools: 7-Zip(Free), WinImage(Demo)
- Download the ESXi ISO
- Open the ISO with 7-Zip
- Extract “install.tgz”
- Open “install.tgz” with 7-Zip
- Click on “install.tar”
- Browse to “usr\lib\vmware\installer\”
- Open “VMware-VMvisor-big-3.5.0_Update_2-103909.i386.dd.bz2″
- Extract “VMware-VMvisor-big-3.5.0_Update_2-103909.i386.dd”
- Open WinImage and go to Disk, click on “Restore Virtual Harddisk Image on physical drive”
- Select a physical drive
- Select “VMware-VMvisor-big-3.5.0_Update_2-103909.i386.dd”
- Click “yes” to write the DD image to the USB Disk
After building an ESXi bootable flash drive, I downloaded the community maintained config, renamed it to oem.tgz, and pasted into the bootable partition on the flash drive – overwriting the existing one.
Time to boot it. After inserting my USB ESXi, I had to go into the BIOS of my board and set the USB drive to be bootable. I also had to change my SATA drive configuration to be AHCI instead of RAID or IDE. After saving, I was eventually greeted by the ESXi system.
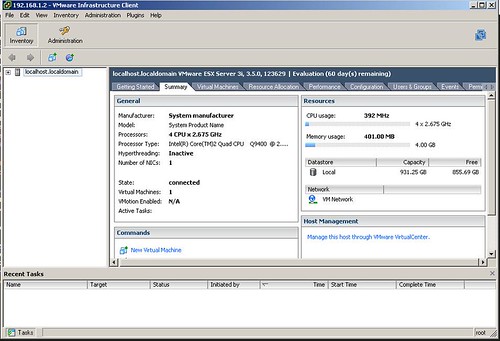
You will need to adjust your network settings to be appropriate for your network, which you won’t have the option for unless you have a compatible NIC (get a listed Intel NIC). Once ESXi is network capable, you can go to your server’s IP address (http) and download VMware Infrastructure Client to manage it. I went to VMware’s site and downloaded VMware Converter (also free) to convert an existing workstation VM to ESX format; took a while but I did it over wireless. You can also use the converter to convert an existing physical computer to VM. The converter uploads directly to your ESXi server, and it will complain about using a login without a password, so add a password to your ESXi root user account and use that.
So far, its working like a champ. The next step is to set up a FREENAS iSCSI target server via crossover cable to a dedicated NIC. If you have any pointers, let me know. Cheers.